Thursday, April 9, 2020

Easter Stories

A Collection of Easter Stories :)

If you are quarantined at home and want to share some great Easter stories with your children then these books are for you!  I wanted to reach out in this time where I cannot read in person to most of our childcare children in a way that they can see the story also.  This is new for me to try so please forgive the amateurishness.  I’m definitely amateur, but they are great stories!  I’ll also show other stories that are fun for Easter.  I will upload more later.  Keep checking back!


Sorry, had trouble with the videos, they won't load properly.  If you go to 
https://www.facebook.com/NanasLearningPost/  you can see the books, you will just have to scroll, sorry. :(  


Sunday, April 5, 2020

Let's Go On A Nature Hunt

Let's go on a nature hunt!

Want to entertain your children as well as have some educational fun?  Try a nature hunt!  I was just noticing the intricate details in the way God created each and every plant differently.  The shape of leaves, the texture of leaves, even the coating on leaves.  Take your children on a nature hunt to explore different leaves and how rain collects on them.  I'm writing about using leaves but this could be used to explore anything.  Leaves, stems, bark, flowers, plants, trees, the rings on a stump, could all be great things to explore.

Here are a few different ways you could explore this.

1.  Simply go outside after it has rained and slowly look at each plant you can find with a magnifying glass to see how the water pools on the leaves, beads on the leaves, or runs off the leaves.


2.  Go outside ahead of your children, take pictures close up of different leaves then have your children go outside and try to find the leaves or plants where the pictures came from.


3.  Have your children go outside with a camera or a phone camera to take close up pictures of plants that take their fancy.  Print the pictures, use magnifying glasses to explore the pictures further.


As you look at each leaf, notice the veins of the leaf.  Note the color, the texture, and if it is soft, smooth, waxy, or rough. Turn the leaf over and note what you find there.  Does the leaf have any holes (hungry caterpillars?). Depending on the age of your child, have them draw a picture of what they find, or have them draw a picture and write their findings.  Paint a picture of what is found.  Or, put thin paper over a leaf and use a crayon that has been peeled to do a rubbing.


There are so many variations of textures and colors available to study in nature.  Go outside on a rainy day to explore.  Go outside on a sunny day to explore.  As you go, go with curiosity like children.  Walk around with fresh eyes for the beauty available in nature.


Begin or follow up with a story.  This one is a fun story about an adventure while looking for nature. 

How to create a wooden xylophone

Creating a Wooden Xylophone DIY


I love having an outdoor classroom area but I abhor paying big money for anything.  I enjoy creating fun things for our areas. An outdoor music area is great for a school, preschool, homeschoolers, or a home of nature lovers or music lovers.  We have a few different music items in our music area.  The one I want to highlight right now is our wooden xylophone.  Our first wooden xylophone, put in 6 years ago, just started breaking so it was time to replace it.  It was built by a friend so we simply took some measurements and recreated it.  You can create one as well!  Here is what you will need.  A saw to cut 2x4s, and a good drill to drill holes through the 4 inch sides, and a sander.  A belt sander is perfect for this but a handheld sander will work also.  You will also need maybe 30 feet of nylon rope (we used 3/8" nylon rope) and spray paint in whatever colors you want to use.  We used Krylon Color Maxx bright colors of green, blue, red, yellow, and orange.  To hang it we used 4x4’s cemented in the ground.

Directions:
1.  Cut the 2x4s into the following lengths. (If you purchase 2 - 10' 2x4s you will have plenty)
       10”
       12”
       14”
       16”
       18”
       20”
       22”
       24”
       26”
       28”


2.  Spray paint each 2x4 in whatever color scheme you choose.  You will want to spray multiple coats of paint to make sure it is resistant to water/rain.  Take special care to coat the ends well, particularly the end that will be on the top. I laid them out on thick plastic trash bags.  They didn’t stick to the bags and when they dried I turned them over, sprayed them again and put it back on plastic to dry. I learned an important lesson about handling them as I laid them down.  I learned to wear gloves while spraying so I didn't accidentally get spray paint from my hand transferred on to another paint color.


I took our old Xylophone and laid it out so we could see how the rope had been tied between the boards.  They simply had one knot between each set of boards to keep them apart.  So obviously lay them out from smallest to largest. 


Then one by one you will want to measure in from each end on one side as shown 2" from one end and 2" from the other end and mark in the direct middle of each measurement so it is centered 2" from each end.  As demonstrated by my fabulous husband, Papa Joe, Drill a hole large enough for your rope going all the way through the board as illustrated.


The next step is to drill.  We tried drilling on the sidewalk but found it was difficult to hold the board still while drilling.  Putting it in a vise grip worked pretty well but ensuring that the drill was straight up and down not angled to a side was difficult, yet important.  A few of our holes were not perfectly lined up but still works effectively for a kids xylophone.  After you drill your first hole thread your rope through it to make sure it fits easily through it.  It is better to adjust your hole size after the first hole than re-drill all the holes.

Almost finished!!  Now, lay your rope out along the top row of holes and the bottom row of holes.  Ensure you have enough rope on the ends to tie, accounting for space for the knots in between each board.  Now begin threading the rope all the way through the first one, tie a knot, continue to put it through the next hole, tie a knot, repeat to the last board.  Now, repeat that process on the bottom rope and row of holes. 


Once you have them all tied and have decided where you will install the xylophone, using post hole diggers dig holes about 3' deep in the ground and put your 4x4 in the hole.  Next, mix cement following manufacturer directions and pour cement in the hole around your 4x4 leaving enough 4x4 at the top for your xylophone.  Lash your remaining rope from each side around the board multiple times to support the xylophone, then tie it off using a good sturdy knot.  We used a clove hitch knot


Your music area should have different textures, colors, sounds, and even smells.  Try incorporating things like different woods for different scents.  We have a wood frog guiro rasp
that is made from a different wood (not sure of wood) but it smells different than the eucalyptus mulch, pine boards, bamboo, and timbers.  Obviously incorporating different sounds is important.  We have wind chimes that the children can reach to tap, small metal xylophone, the bamboo people chime, old pots secured on the xylophone 4x4s that make different sounds.  One is cast iron and coated, the other is aluminum.  We have cactus rain sticks for gentle sounds, and empty water bottles with bells in them for jingle sounds. We incorporate scarves for dancing or dramatic play.  Our stages are large stumps buried in the ground.  We will have to replace them soon as they are deteriorating.  Florida weather is hard on wood.in the ground.  I don't mind paying for smaller items, but as you can see, use what you can find, make what you need, and add small items that you can purchase for a reasonable price.  Now go make your xylophone and make some music!

Wednesday, October 30, 2019

Fairy House Play DIY


Tree House for small world play


So I decided with how much the children loved fairies that I would make them a "fairy house".  But I don't want it to be just for fairies.  So I purchased some Waldorf style people from Amazon, and soon we will have little people to play in the tree house.  We will put some tiny clothes on them and away their imaginations can go!  So much social play happens, and learning to share and take turns happens quite naturally while playing beside each other when their are plenty of dolls to include and the house is big enough.   :) 


So if you want to build one for the children in your life, break out some tree cookies, and small branch pieces for spacers between floors, and some wood glue, and get ready to hold and and prop up for a while.  Ours has Oak, Cedar, Camphor, and Birch pieces put together to form the tree house. 


Pin it   Facebook


Monday, April 29, 2019

Gardening in Preschool


I love Gardening no matter what season!  New growth, fresh air, a bit of rain (hopefully), hearing bird sounds, herbs, vegetables, and flowers.  I love to impart my love of learning to the children, so we have to have fun activities to learn with while we investigate gardening.  I like to introduce gardening by taking a walking trip around the yard to look at what plants are there, what needs watering at the moment, and what needs plant food.  This is always a great time to allow watering as the plants may wilt. Children learn best and internalize what they learn with hands on activities included daily.

We talk about what plants need:  Soil (usually), water, and sun light.  We also have a vertical aeroponic garden (tower garden). Almost daily we take our magnifying glasses out to investigate plants, and bugs, spider webs, ripe tomatoes or cucumbers, and so much more. As it is spring right now in Florida it isn't too hot, and it is usually sunny.  That means the VPK class can work in centers outside as much as possible.  That means spelling words making letters with small sticks, or using our rock letters, or building bug buildings or whatever else in the outside block area.

We have had the tower garden for 2 years now.  It is a great tool to see the growing process as they grow faster than on the ground.  Also, being at eye level or just above eye level we can  notice daily the leaves budding out and growing, flowers blooming and produce growing out of the bloom or behind the bloom.  Watering plants is great for each age from 1 year olds to 5 or 6 year olds.  Its calming and they feel important as they are helping plants grow.

Below you can see one of the painted lady butterflies that we grew this year from Insect Lore Butterfly Larvae.  We have had great success with them as almost all hatch out to release.  We also grow ladybugs to release.  Both are beneficial insects for gardening, which of course we learn about the benefits of butterflies and ladybugs in gardening with literacy and exploration.

 Below is our worm bin.  This is what happens when the children put the Little People pigs in during farm activities, and also include some wheat berries that were for "feeding" the Little People animals. :)  Great impromptu science activity.  These wheat berries are over 10 years old and still sprout very quickly (2-3 days)
 Painting pots and planting seeds or flowers is another fun, hands on activity for gardening.  Three and four year olds can fill the pot on their own, and be in charge of their own planting.


A less expensive version of planting seeds is the paper cup.  They can later be planted at home with ease.
Caring for the butterfly garden often is a class activity.  Pulling weeds to allow the plants to grow better, which means learning the difference between a weed and a plant.  Also they need watering daily in Florida due to the heat.  


The butterfly garden changes with the seasons.  We added some herbs that butterflies are supposed to like and lay their eggs on.  So far they seem to like laying their eggs on the tower garden and munching on our cucumbers. :(
 We upgraded our sink to this stainless steel hand sink.  Purchased it on Amazon if you would like one.  Super easy install if you get the quick connect hose attachment.  I love this sink, it is easy for all children to access the water to fill the watering cans and water plants.  It also makes messy play easy to clean up outside instead of tracking in just to wash hands.

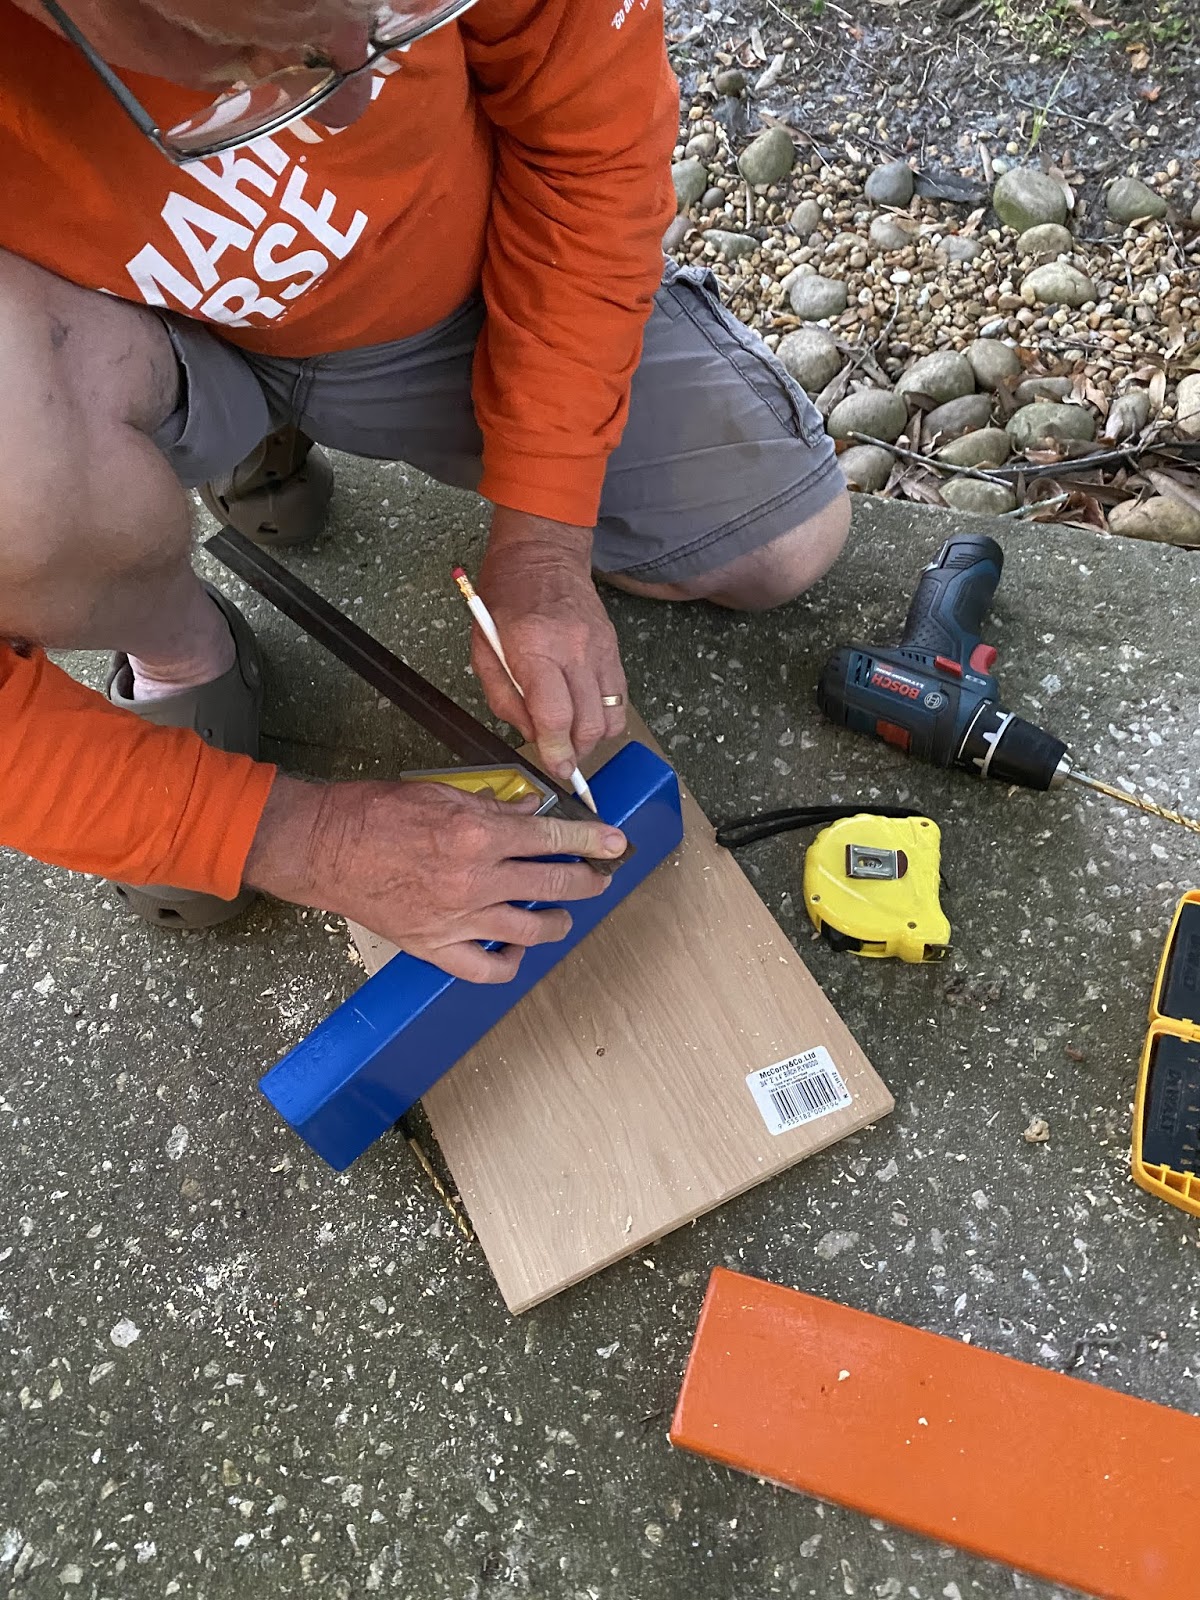
 Since most gardening includes soil and mud, having a mud kitchen or mud experience area is a must.  We had a different mud kitchen, one that looked more like a kitchen.  However, being in Florida, the ants decided to nest in it.  We upgraded to a Cedar Slab (bugs don't like cedar) coated with polyurethane.  In other states you probably don't need the polyurethane.  I think the children like the new mud kitchen better as they can get more children at the mud kitchen, and they don't have to be alert for ant invasions.  Our gathering area/stepping logs often serve as a table or party area.


Enough of the outside activities!  Many of our activities can be enjoyed inside or outside.  Such as the playdoh garden word spelling, or making sight words with rock letters, or anything that is heavy enough to not blow away.


Some activities are better inside.  We quickly discovered that paper activities are better inside due to the breeze blowing them away. Counting butterfly noodles (bowtie noodles) on the number flower is one such item, Matching ladybug letters is another.  


Dancing around flowers is a creative expression task (we use old check in flowers) and a gross motor task.  Planning where your feet are going to land is important, so this targets gross motor as well.

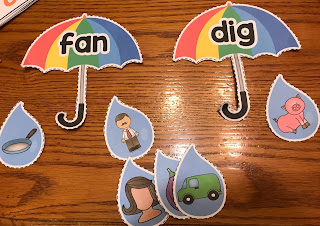
 Some of our inside literacy activities during gardening study are matching rainbow letter with beginning sounds (rain), and number of syllables.  Also below are umbrella rhyming words.  Many of the activities we use are from Lavina Pop's Spring Preschool Center


Love this sight word petal to flower matching game.  So helpful and fits perfectly in this old fossil watch box.!


 We also have some mini carrot addition and subtraction games.  I found the mini carrots on Amazon.  Obviously don't give them to children that still put things in their mouth.
The sight word fishing game is from Lakeshore Learning.  It is a fantastic tool.  At first we play fishing with the pieces up.  We focus on finding a word they can identify then typically they find all of the one word.  They can keep the ones in front of them they can say.  Then we play fishing for different words - keeping the ones they can read.  Now we are playing it turning all the fish word side down, and reading the words they catch.  Again, they get to keep in front of them the words they can read.


 The Sunflower Sight Word game we have had many years.  It was printed from File Folder Fun.


This matching game is slightly harder words with the silent E at the end.  Not everyone is up to this challenge yet in our Pre-K VPK classroom.


So many fun math activities for gardening, spring, bugs, or whatever that fit in with gardening.  Counting ants is fun.  They roll playdoh to make the letter then count the right number of ants on the page.  I slide the paper pages into sheet protectors for use with playdoh.


Below are playdoh pages with visual instructions for students.  It's the same concept.  Roll out playdoh to make letter, then roll playdoh into a little raindrop making the correct number of raindrops.


 Love this caterpillar beginning letter sounds game.  Involves using links to connect, or if that is too challenging it can be lined up like a caterpillar.
Using acorns to count out the number on each seed section.  Easy, fun, sensory. :)

 This flower letter/phonics game is awesome.  First - the upper case and lower case letters can be matched.  Additionally each set of letters can be matched with one color set of pictures.  Multiple games in one. This is included in the Spring Preschool Center I linked above.
 Love these printable words that print above carrots.  So easy to use for writing in sand, spelling with magnetic letters, or whatever way you want to use them. These cards are in Morning Work Stations - April linked above.

Then for dramatic play, there is the florist shop for pretend planting, arranging, buying, and selling flowers.  


And of course you need painting, whether it is stamping with ink or paint, using paint brushes, or hands, some sort of artistic expression is explored.

More fun math counting from the same set.
 One of our sweet butterflies being released.
Just a fun use of ladybug and bee rocks - playing tic tac toe. 


 I highly recommend taking a field trip to a farm to see gardening on a much larger scale.  One big benefit is you will have something yummy to enjoy - this was strawberry picking. :)

Last, but definitely not least, is a small selection of our books we use when talking about gardening.  Also, a sample week lesson plan we have used.  There are many more wonderful books for learning about gardening.  Message me if you would like more book titles.


Lastly, this is how I store my centers ready for the day.

Now go inspire a love of gardening!! 

Easter Stories

A Collection of Easter Stories :) If you are quarantined at home and want to share some great Easter stories with your children then these...